With Christmas music on the radio and the hit of the first big snowstorm of the season, I am definitely ready for the holidays! One of my favorite parts about wintertime is the crazy number of cute ways you can paint your nails. The best part is, if you're like me and not the most artistically gifted person in the world, there are so many simple and creative ways to make your nails look as festive as you feel!
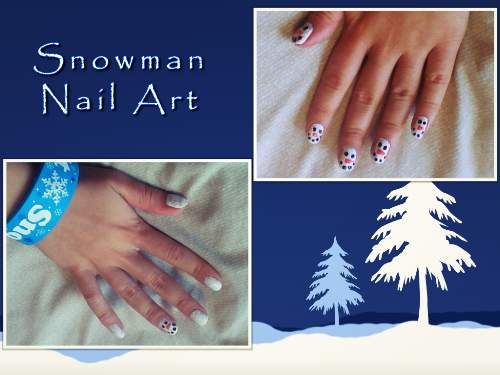
This year I'm starting off the season with sparkly snowman nails. This cute design can be worn a couple different ways and is as easy as pie to make on your own. It's a great way to take a little bit of snow with you wherever you go!
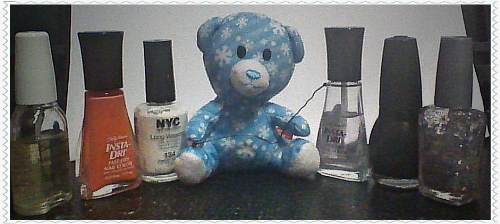
To get started you'll need white, black, orange, and a sheer glitter nail polish. To draw the face of the snowman, you'll need a bobby pin that you can stretch open, a toothpick (optional), and an index card that you can pour some polish on.
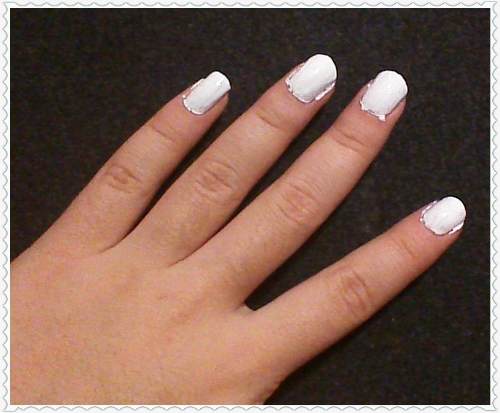
Start off by washing your hand and applying a base coat or a clear polish to protect your nails. Wait a few moments until your nails are dry and then begin your design by painting your nails a solid white.
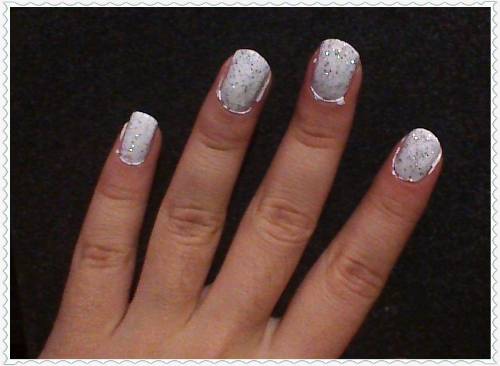
Wait again for it to dry and then apply a thin coat of the glitter polish to give your "snow" that shiny look. If you're buying a clear glitter polish, be careful not to confuse it with a regular silver sparkle polish, as anything you paint over with it will be covered up. I'm using "Kaleidoscope" by Wet N' Wild.
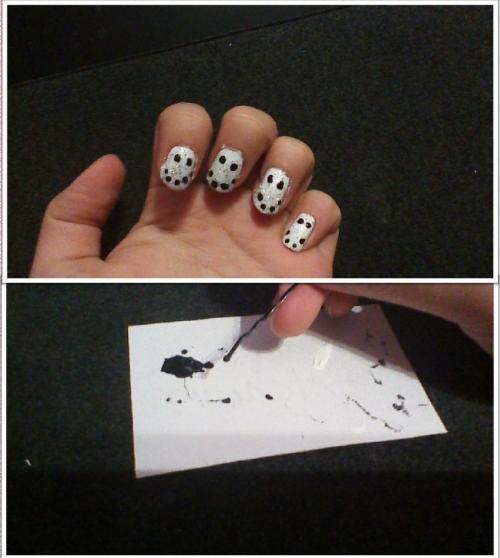
Once you've set the snowy base, it's time to paint the snowman's face! Start by taking your black nail polish and brushing a few globs of it onto an index card for easy access. Then, take your open bobby pin and dip one end of it into the liquid. The round end makes a great dotting tool and is the perfect size for the snowman's eyes and mouth. Carefully make 2 dots for the eyes and a series of 4 dots in a curved line for its smile. If the polish on the card starts to get dry and globby, add some fresh polish from the bottle.
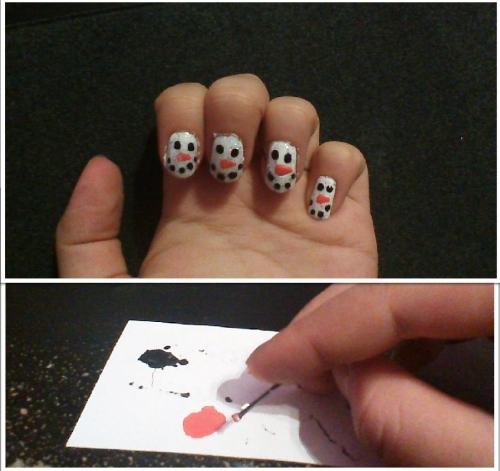
When your snowman's eyes and mouth are dry, you'll want to paint on the carrot nose. Unless you want a Voledemort snowman, whatever floats your boat! For this step, you can either use the clean end of your bobby pin or use a tooth pick for cleaner lines and more control. Again, brush a small amount of orange polish onto the index card and then create a small, sideways triangle to make a carrot. If you're braving it out with a bobby pin, make 2 small overlapping dots for the wide end of the nose followed by single, lighter dots as you reach the end.
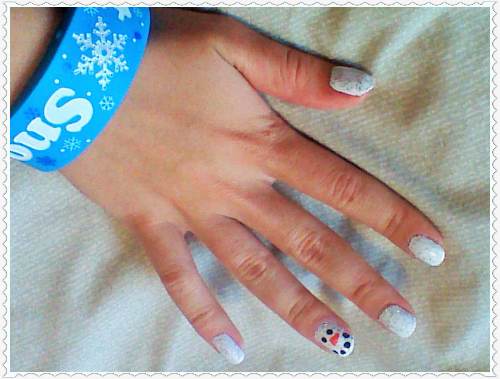
When creating this design, you have the option of either painting a snowman on each nail or putting one on only your ring finger as shown above. However you go about doing it, when your snowman/men's face is completely dry, go over each nail with a top coat or a clear polish to protect your design and ensure that it lasts longer.
And there you have it -- a fun, sparkly snowman nail design to really get you in the holiday spirit. What I love about this design is how easy it is to make, while still looking adorable! With a few simple steps, you have some winter buddies to show off to all your friends.
Hope you enjoy!
