The month of December is in full swing and so is the start of Christmas preparations for many people. This past week I've started on a little Christmas shopping and went to my town's tree lighting ceremony, and I'm definitely in the holiday spirit! To stay festive this week, I've painted my nails with a cute and simple Santa Claus design, and I'll show you how to get the look too!


To create this design you'll need a few different colors of nail polish including red, black, white, light pink, sheer pink, as well as a top coat and base coat. You'll also need two tooth picks, a stretched open bobby pin, and an index card.
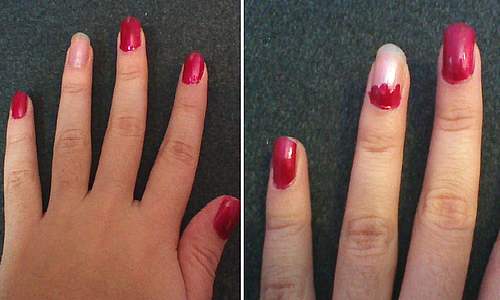
Before you start, be sure to paint each nail with a base coat or clear polish to protect your nails. Once that dries, begin by painting your ring finger with the sheer pink polish to act as your Santa's skin, and paint the rest of your nails with a deep red polish. When your ring finger is dry, paint about 1/4 of the nail with the same red for Santa's hat. Don't worry about making the line too neat, as you'll be covering it up later.
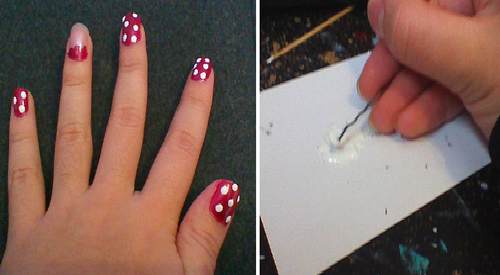
Next, brush a small glob of white polish onto an index card. Proceed to make about 3-5 polka dots on each of your fully red painted nails by dipping the bobby pin into the white polish and carefully pressing it onto the nail. Be sure to constantly add fresh polish to the card; if you try to make the dots with a drying polish, it will become sticky and stringy and mess up your design.
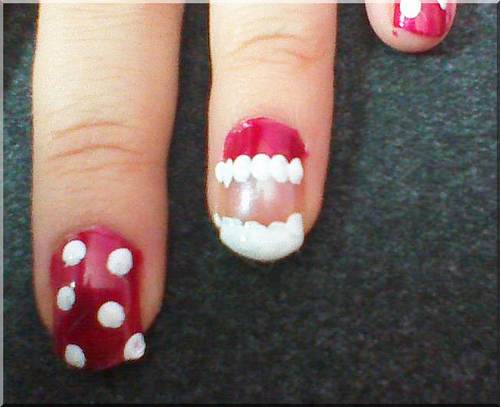
Once you've made your polka dots, use the same technique to draw on Santa's beard and to finish his hat. Use about two overlapping layers of polka dots to create the beard and make a straight line of dots across the bottom of the red you previously painted on to finish the hat. Remember to keep using fresh polish!
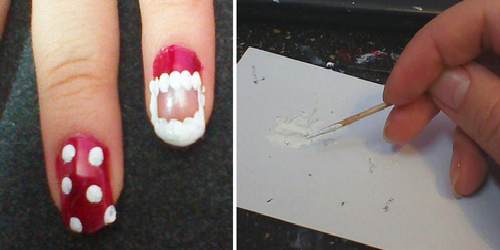
When you've finished the hat and beard, take a toothpick and roll the bottom 1/4 of it in the white nail polish. Connect Santa's beard to his hat by carefully laying the toothpick against each side of your nail using a gentle pressure.
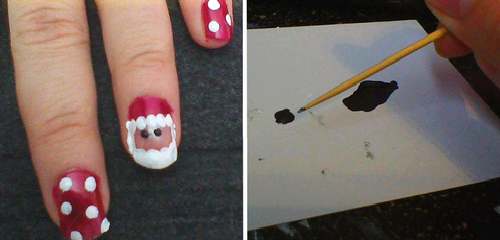
Next, brush a small amount of black nail polish onto your index card for the eyes. Taking the second toothpick, dot two eyes onto your nail. If the dot the toothpick creates is too small, make several small connecting dots for each eye using a careful stippling motion to widen it.
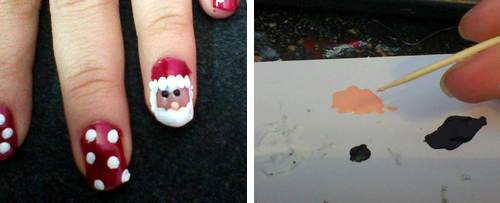
Finally, pour a small amount of the light pink polish onto your index card for Santa's nose. Using the clean end of your toothpick and the same technique you used for the eyes, create a small button nose right above the line of the beard, making the dot bigger if necessary. When dry, protect your finished design by brushing a top coat over each nail.
And that's all there is to it! You now have cute, polka dot Santa nails that are perfect for any Christmas occasion. What I love about this design is how it's designed purely from polka dots, with no need for any kind of difficult drawing. I know I really enjoyed making these Santa Claus nails, and I hope you do too!
Enjoy the holiday season!
