The other day, my friend suggested that I write up a tutorial on makeup for bigger, brighter eyes. As someone who was born with naturally large eyes, I thought she was joking, but then ultimately decided that writing up a tutorial on this would actually be beneficial to some people. I personally don't like wearing heavy makeup, mainly because I'm terrible at it. In this tutorial, I will teach you how to use natural colors and light makeup to enhance your eye's beauty.
Step 1: Tightlining
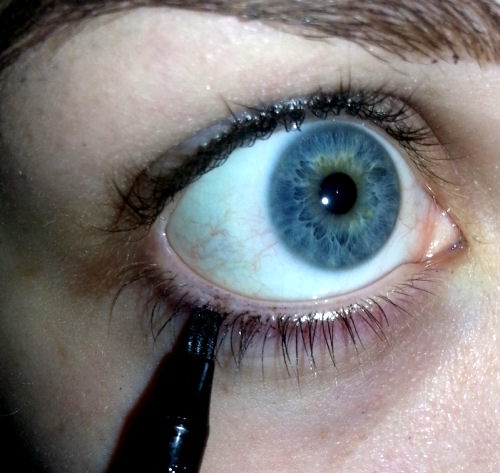
Tightlining, if you are unfamiliar with it, involves using eyeliner in between your lashes to make your lashline appear thicker. It's a really subtle way of adding more definition to your eyes and it's very easy to do. For this tutorial, I'm using Intuitive Liner by Bourjois. It's a pen with three tips which makes getting between the eyelashes very easy. For the top lashline, pull up your eyelid and apply the eyeliner underneath your lashline, as close to the eyelashes as possible. Then, on your eyelid, do a very thin line on top of your lashes. I also apply minimal liner to my bottom lashes, once again staying as close to the lashes as possible.
Step 2: Eyeshadow
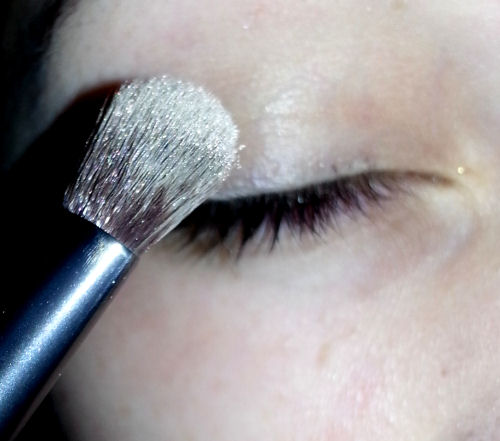
To brighten your eyes, it's best to use an eyeshadow lighter than your skin tone. For this tutorial, I'm using the lightest shade in a palette by Lorac. It is a very light off-white/gold colour. It has some shimmer in it which also brightens eyes.
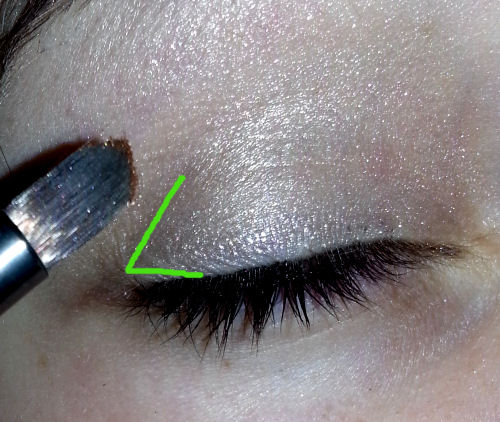
I'm also going to use a darker color that also has some shimmer on the outside corners of my eyes. This adds a little more depth to the eyes and once again, the shimmer draws in light. For this, I'm using a dark brown/gold color by Sephora and applying it only to the outer corners of my eyes, as shown by the green arrow. Then, using a brush, I blended it with the other eyeshadow.
Step 3: Highlighting
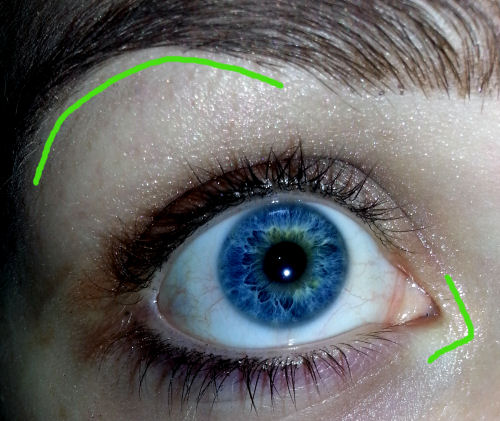
Highlighting is always overlooked but it really can bring in even more light to your eyes. I'm using a liquid highlighter by Temptu but anything from a highlighter pencil to white eyeliner works just fine. I am highlighting the area underneath my eyebrows, as well as the inner corners of my eyes, as shown by the lime green.
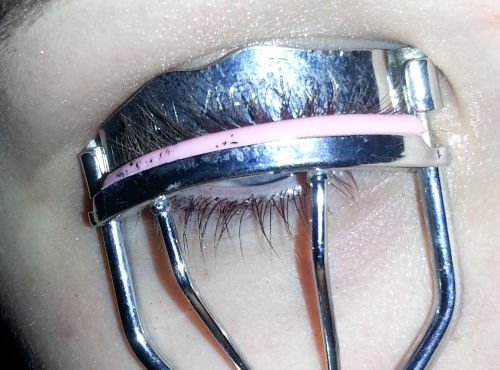
Step 4: Curling lashes
Too many people forget this step! Curling your eyelashes can really open your eyes up and give the appearance of thicker, fuller eyelashes. I'm using an eyelash curler by Revlon. While it may look like a torture device, it's actually very simple to use. Just hold your lashes between the clamps and hold them together for 10 seconds. Sometimes it takes longer, depending on how curled you want your lashes.
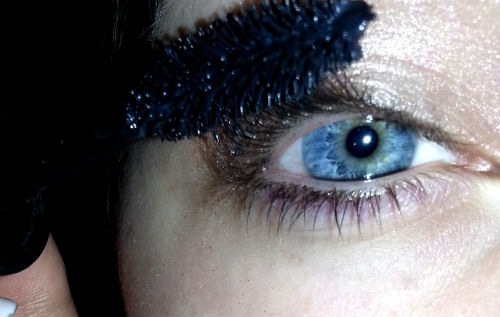
Step 5: Mascara
For this tutorial, I am using Big & Daring mascara by Avon (which I don't love). When applying mascara, try to get the wand as close to the bottom of the lashes as you can. Wiggle the wand back and forth slightly when applying to increase volume and prevent clumping. I generally use about two coats of mascara, but for this tutorial I used three. To further enhance your mascara experience, attempt to apply it without making a stupid face.
And here's the finished product!:
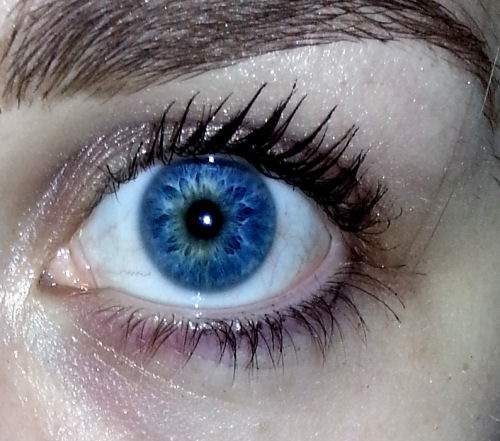
I hope this article was helpful in learning how to brighten your eyes! I also hope this article deters you from ever using Big & Daring mascara by Avon. This look works great behind glasses as well. Enjoy!
